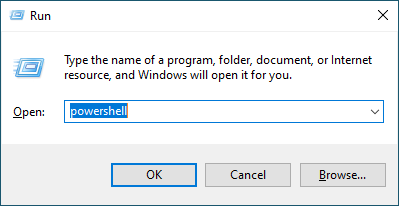
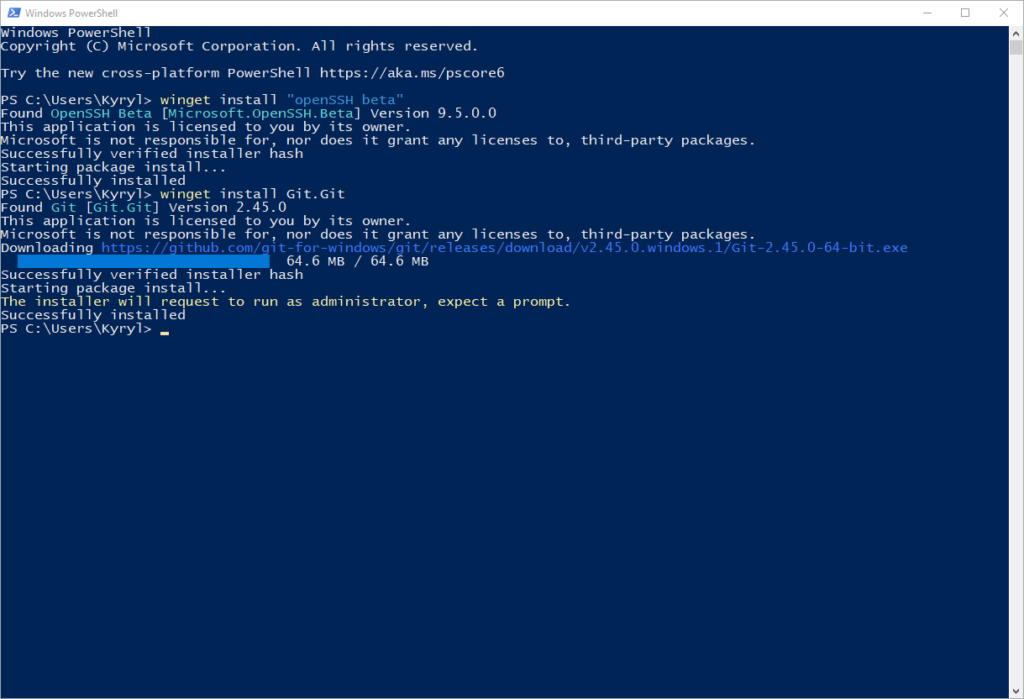
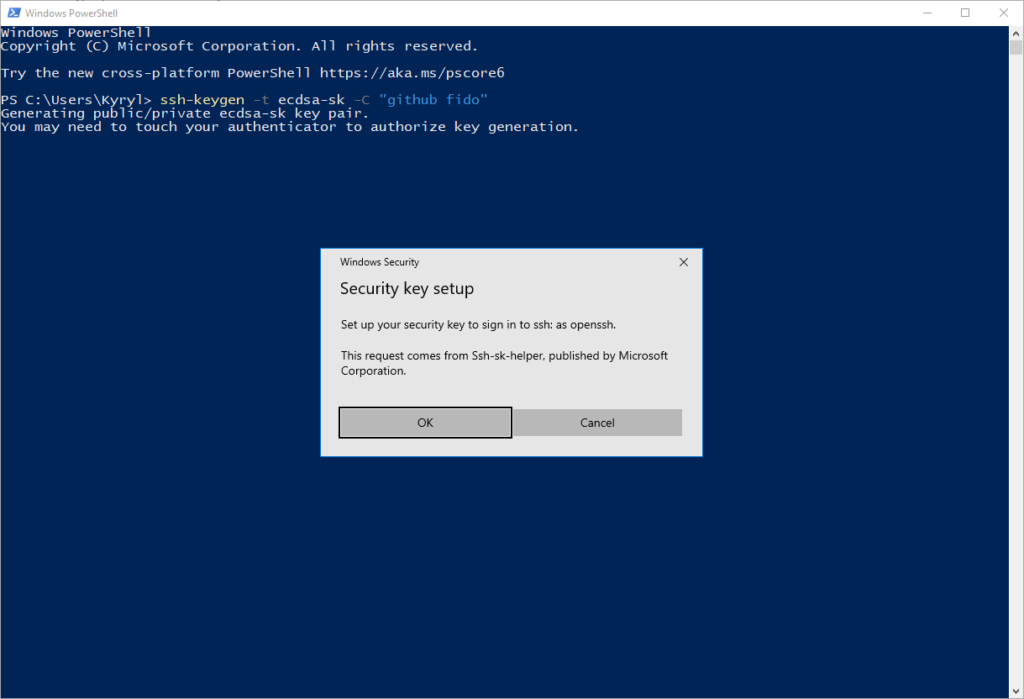
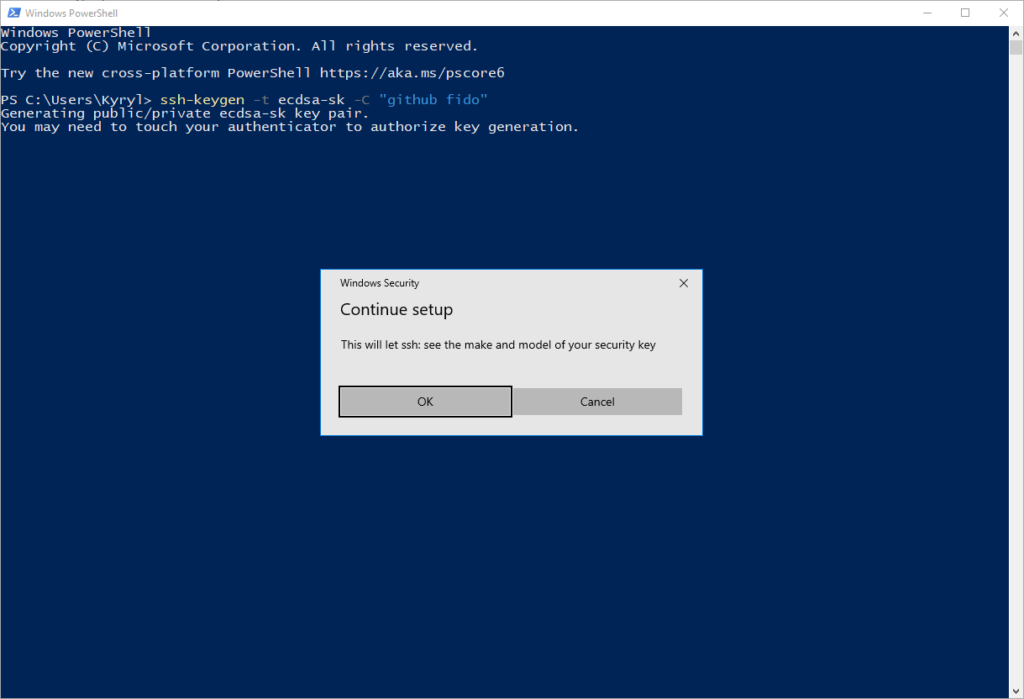
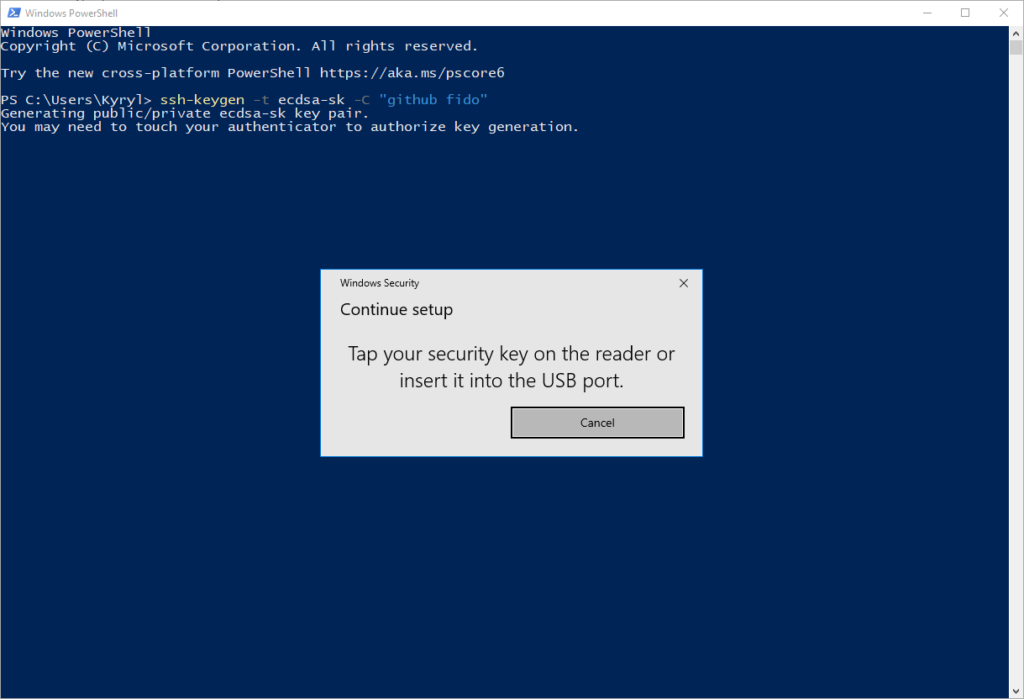
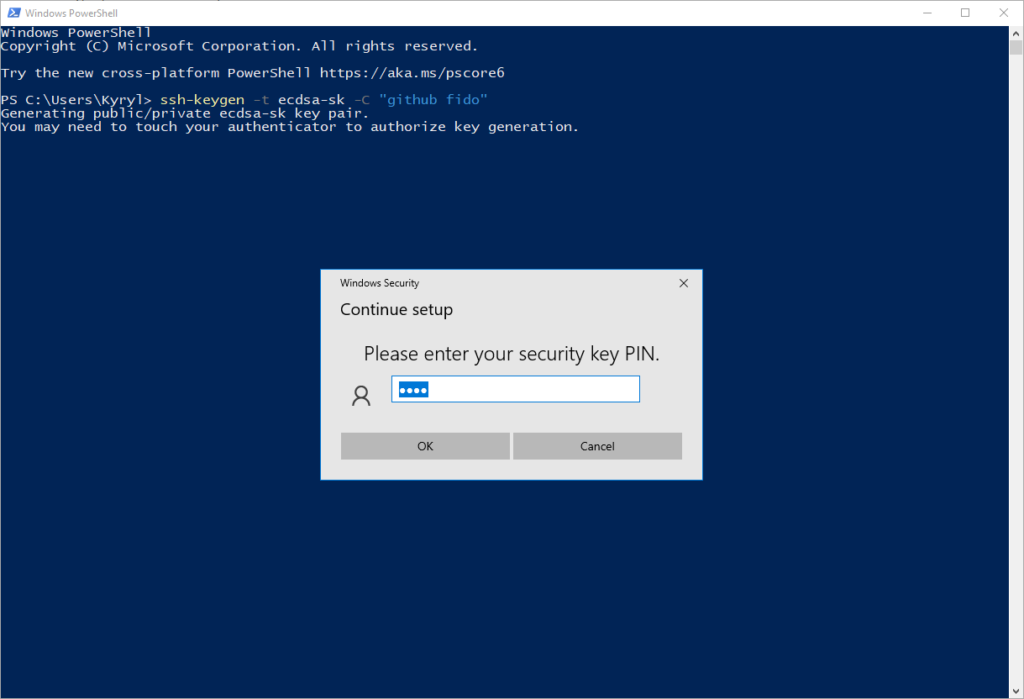
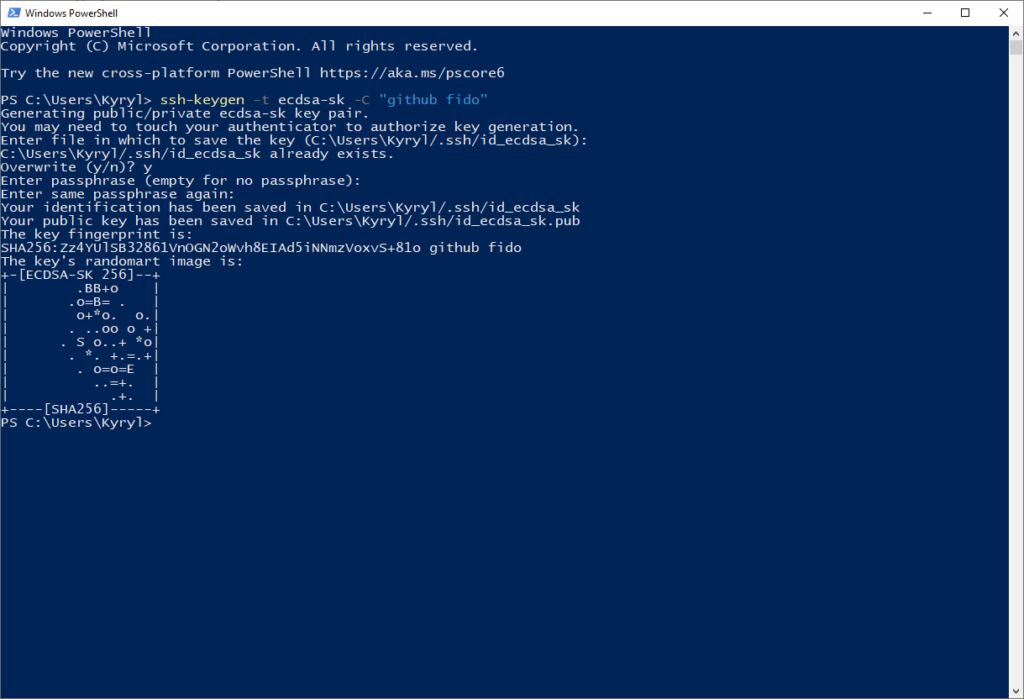
Setup CYBKEY for SSH on Windows This guide will walk you through setting up the CYBKEY for SSH authentication onWindows. Step 1: Open PowerShell Press Win+R, type powershell, and then click OK. Step 2: Install Necessary Software Install OpenSSH and Git using winget. winget install "openSSH beta"winget install Git.Git Step 3: Reopen PowerShell Reopen PowerShell to ensure all changes take effect. Step 4: Generate SSH Keys Generate your SSH keys. When prompted during the process, you can keep all default options (default path for keys and no passphrase). ssh-keygen -t ecdsa-sk -C "github fido" During this process, you’ll encounter several prompts:1. Security Key Setup: A window titled “Security key setup” will appear. Click OK. 2. Continue Setup: Next, a window titled “Continue setup” will appear. Click OK here as well. 3. Security Key Authentication: You’ll be prompted to place your CYBKEY on the reader. 4. Enter PIN: Enter the PIN for your CYBKEY. 5. Configure SSH Key Generation: Finally, configure the specifics of your SSH key, such as the key path and passphrase options or leave them blank. Step 5: Add Public Key to GitHub Navigate to GitHub SSH settings and add your new SSH key.Go to Settings -> SSH and GPG keys -> New SSH key.Copy the public key contents from:~/.ssh/id_ecdsa_sk.pubYou can open this file with Notepad. Step 6: Test SSH Keys Try cloning a private repository to test if the SSH setup works correctly. Replace <some private repo> with your repository’s URL.git clone <some private repo>A security prompt will appear asking you to confirm the use of your security key.If everything is set up correctly, your repository should clone without any issues. Share :