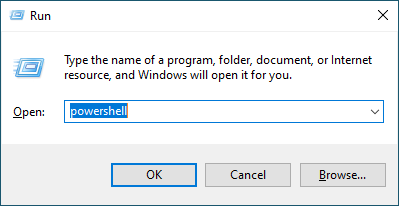
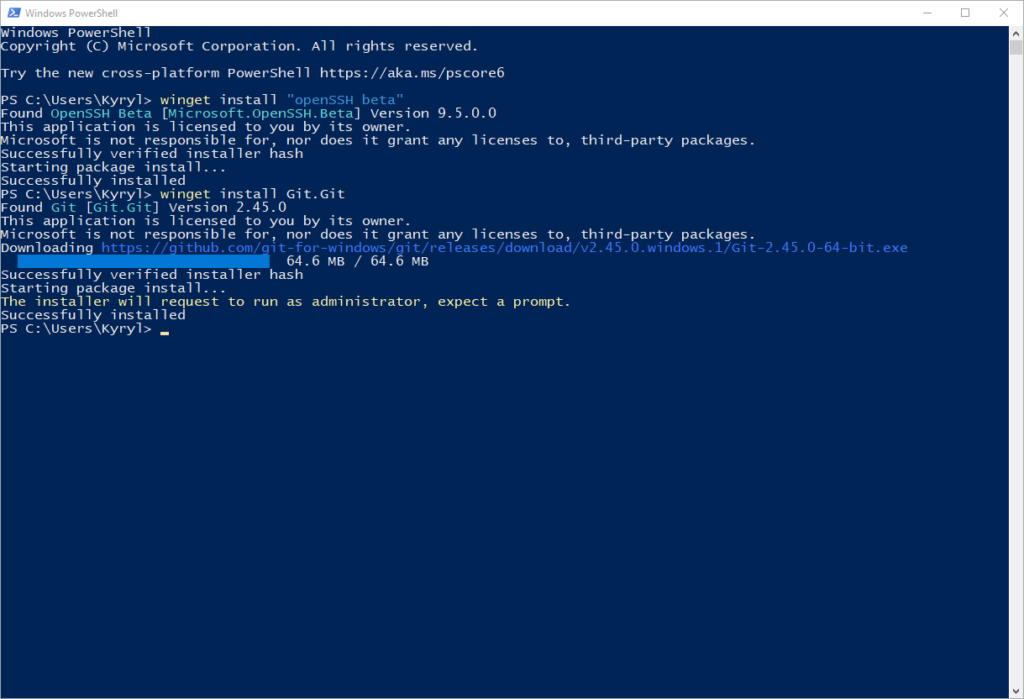
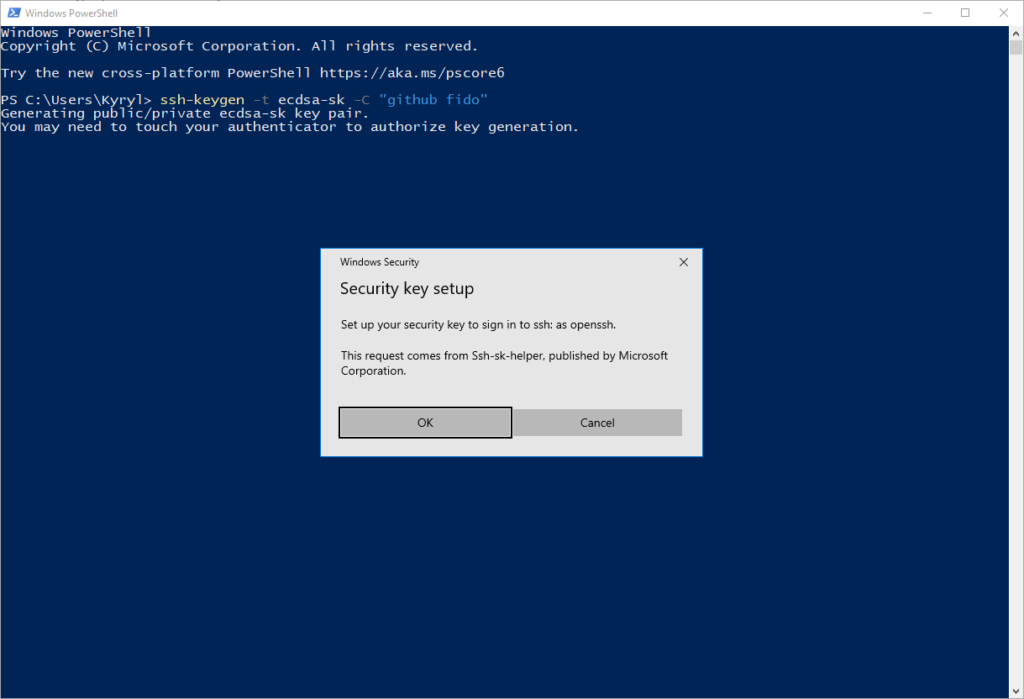
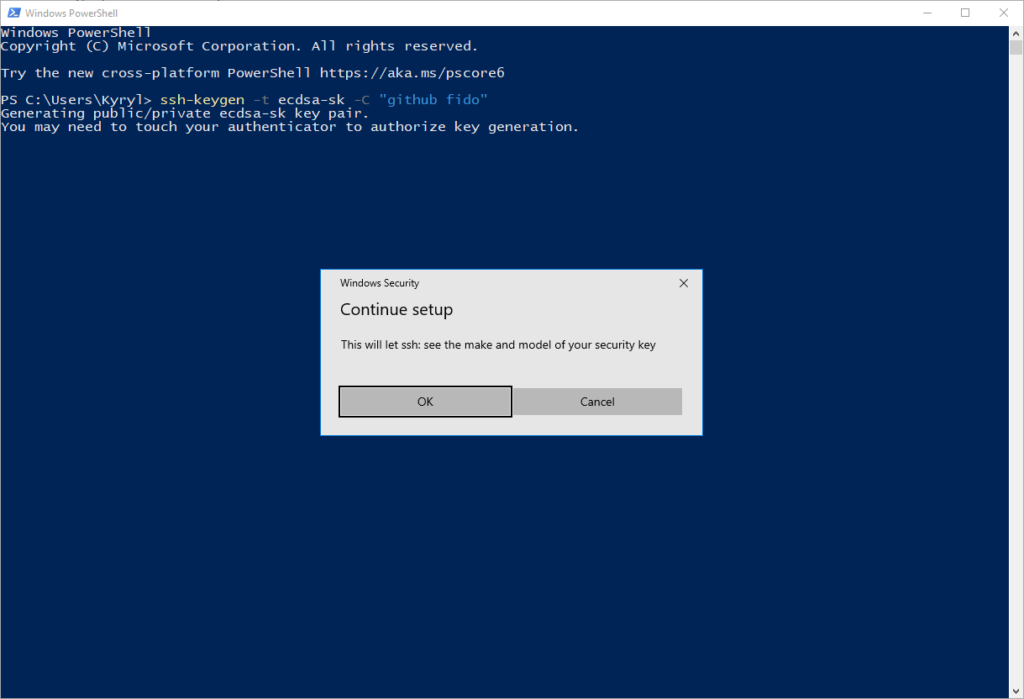
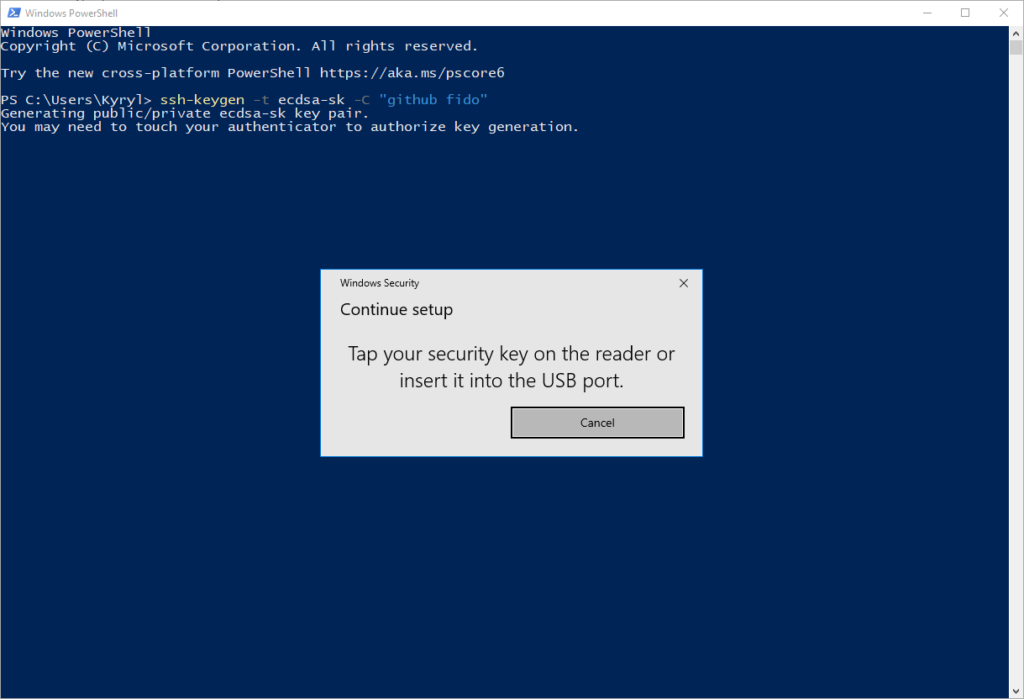
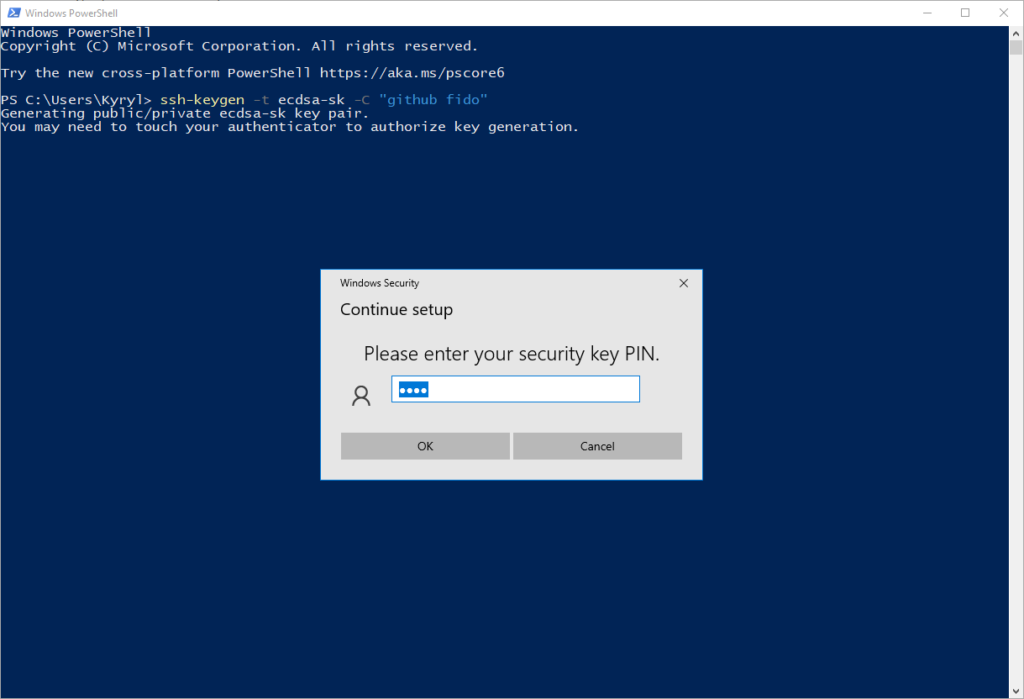
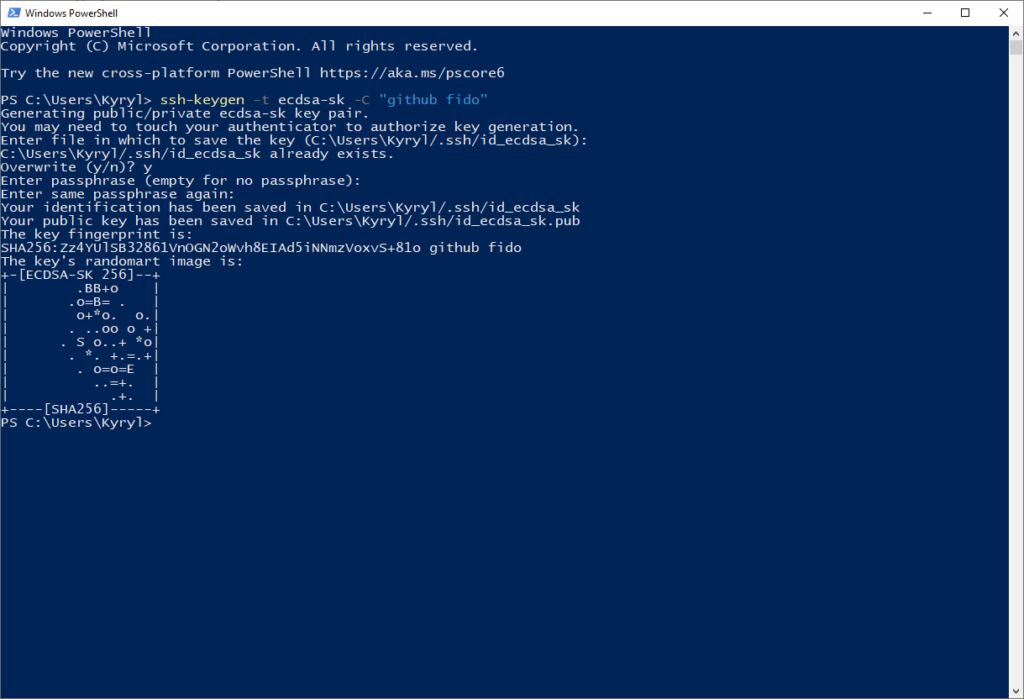
Setup CYBKEY for SSH on Windows This guide will walk you through setting up the CYBKEY for SSH authentication onWindows. Step 1: Open PowerShell Press Win+R, type powershell, and then click OK. Step 2: Install Necessary Software Install OpenSSH and Git using winget. winget install "openSSH beta"winget install Git.Git Step 3: Reopen PowerShell Reopen PowerShell to ensure all changes take effect. Step 4: Generate SSH Keys Generate your SSH keys. When prompted during the process, you can keep all default options (default path for keys and no passphrase). ssh-keygen -t ecdsa-sk -C "github fido" During this process, you’ll encounter several prompts:1. Security Key Setup: A window titled “Security key setup” will appear. Click OK. 2. Continue Setup: Next, a window titled “Continue setup” will appear. Click OK here as well. 3. Security Key Authentication: You’ll be prompted to place your CYBKEY on the reader. 4. Enter PIN: Enter the PIN for your CYBKEY. 5. Configure SSH Key Generation: Finally, configure the specifics of your SSH key, such as the key path and passphrase options or leave them blank. Step 5: Add Public Key to GitHub Navigate to GitHub SSH settings and add your new SSH key.Go to Settings -> SSH and GPG keys -> New SSH key.Copy the public key contents from:~/.ssh/id_ecdsa_sk.pubYou can open this file with Notepad. Step 6: Test SSH Keys Try cloning a private repository to test if the SSH setup works correctly. Replace with your repository’s URL.git clone A security prompt will appear asking you to confirm the use of your security key.If everything is set up correctly, your repository should clone without any issues. Kostiantyn ChertovFounder and CEO of Smart Lab since 2023. Author profiles at dev.to and GitHub Share :